Back before winter set in and the wind grew teeth, I was already thinking about how to get some heat into a fort I was building for the Adventure Girls. It would be the second woodland “fort” we’d made together, the first being a little too close to the house for my HOA’s liking (but that’s a story for another time, depending on statute of limitations). The point is, by the time the new fort was finished in its secret and HOA-free location, the cold would be here to gnaw on little bones. No child wants to freeze their butt off; it tends to turn your new fort from a woodland retreat to just a cold hut you have to endure because Dad got too in touch with his inner child.
So what to do? I knew I wanted a permanent solution that didn’t involve open flame. The obvious choice, short of running electric to the fort (which my dad, grandfather of the Adventure Girls, genuinely offered to do) was some sort of wood stove. Unfortunately, a quick search online showed me that all the small wood stoves on the market were just too expensive to leave in a bushcraft shelter that would likely collapse on it in a few years. Maybe I could build something on the cheap, I thought. Ammo cans and fifteen gallon steel drums seemed like decent candidates. Maybe I could cobble something together that would hold a small fire.
And then, while I was wandering Home Depot instead of doing something productive, it came to me. Mailboxes. They’re cheap, they’re metal, they’re flat on one side – hell, they’ve even come with a door. There was the body of my wood stove, staring me in the face from Aisle 25. A few minutes later I was out the door with a half-baked plan and a cart full of parts.
Here’s what I did.
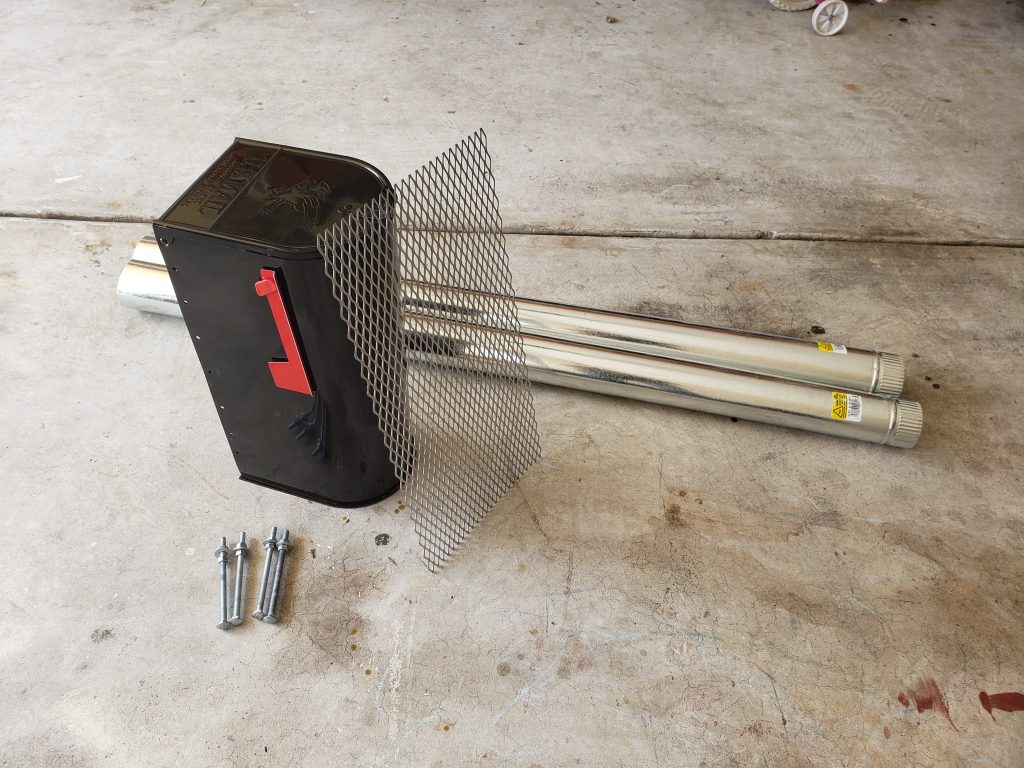
Along with the cheapest steel mailbox they had, I also got two five-foot sections of four-inch stovepipe, four long carriage bolts with two nuts and two washers for each, and a sheet of steel mesh. Everything else I needed was already at home, except for my unearned sense of competence, which I keep on my person.

When marking out the circle for your stovepipe, blue painter’s tape is your friend.

Same goes for marking out where to drill holes for the “legs” of your new wood stove.
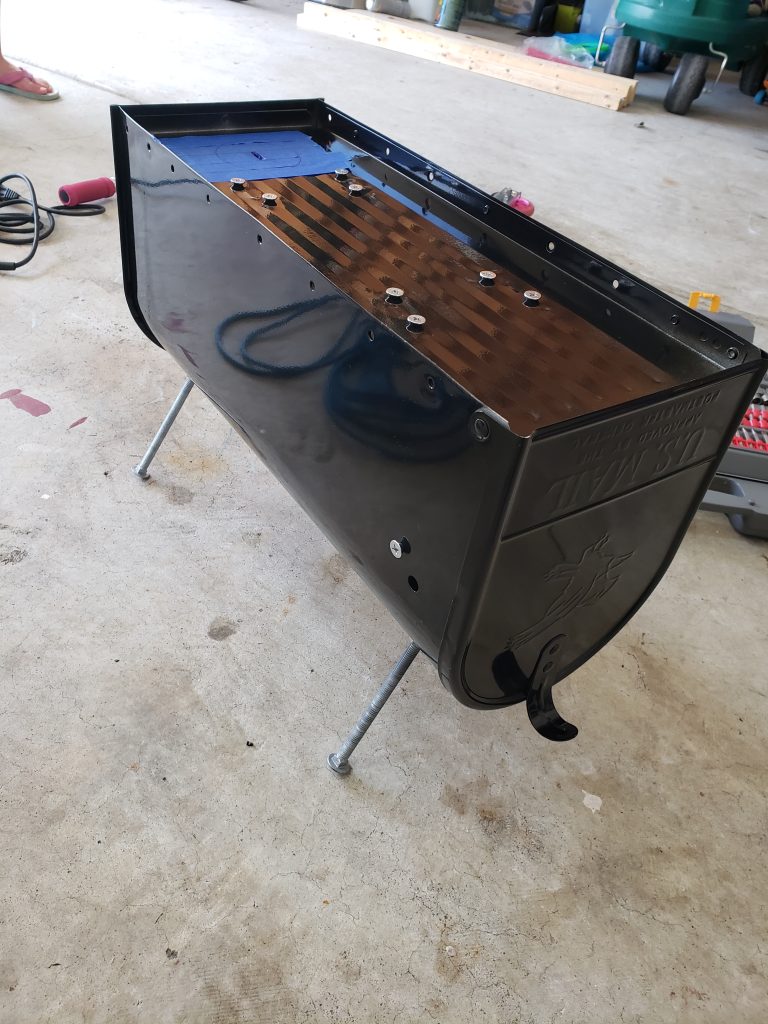
There were a lot of holes for mounting the mailbox to a post that I didn’t need, so I plugged those up with some nuts and bolts I had in a mayonnaise jar somewhere. You know the one I mean, don’t pretend not to have one.
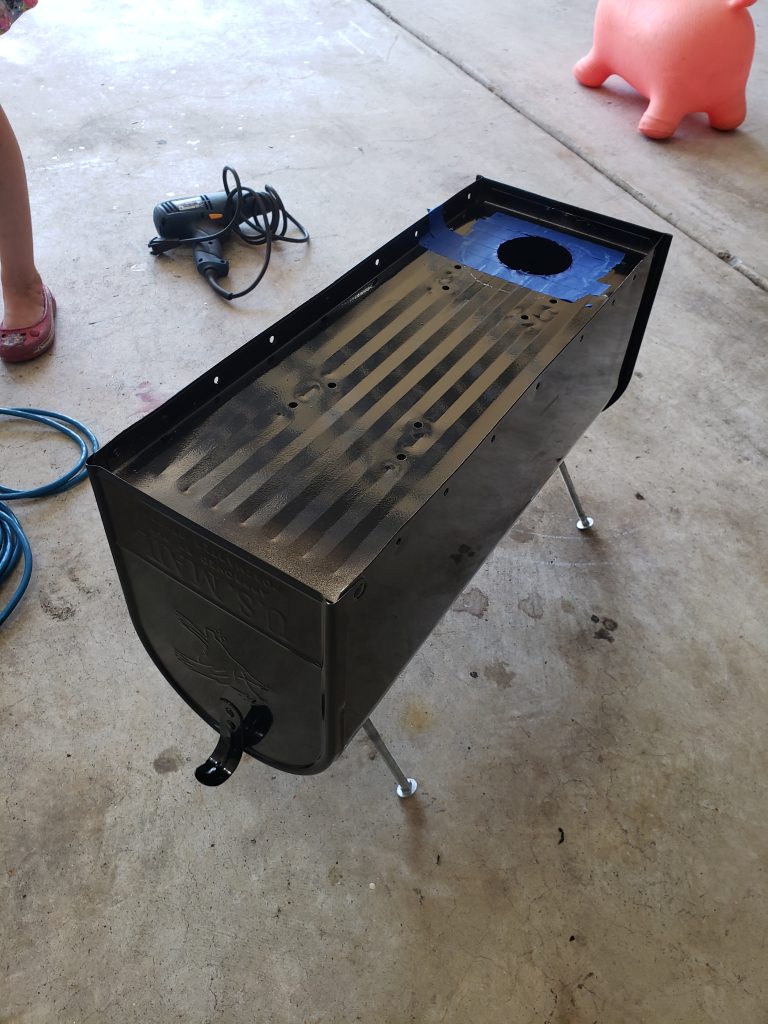
The next step was cutting the cut for the stovepipe and test fitting it. This was a job for the jigsaw, and it made one helluva noise. (I actually cut the hell out of my hand when I slipped handling the stovepipe, but I don’t have pictures of that. There’s no evidence it happened now beyond the new words the kids learned.) I built the stove flat-side-up because it was easier to cut the hole and also gave me a level surface for pots and kettles.

First test-fit of the stovepipe was a success. Adventure Girls for scale.
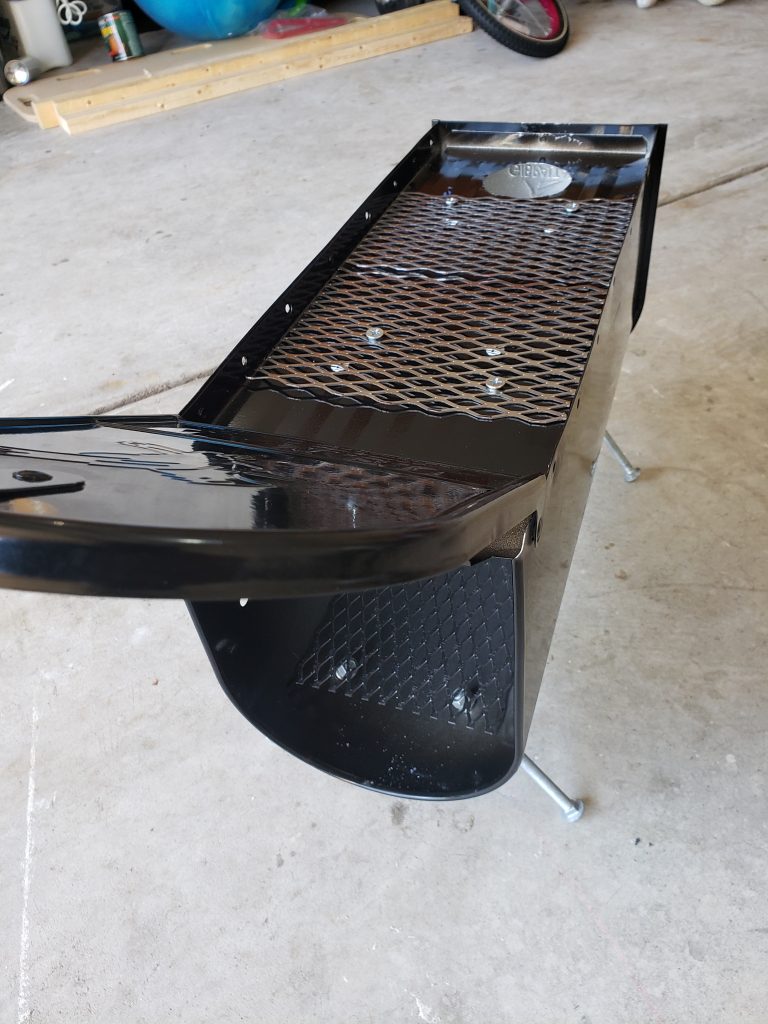
The next step was cutting the steel mesh to size and lining the bottom of the stove with it. I have extra left over, so since I was putting nuts through some unneeded holes anyway I decided to add a layer of mesh to the top as well.

The purpose of the mesh is to get the fire up off the bottom of the wood stove and allow better air-flow for a more efficient burn. It also lets me load the stove with tinder and light it from underneath. (“Tinder” is the fine material in fire starting that will take and hold a spark, for those of you the internet has ruined.)
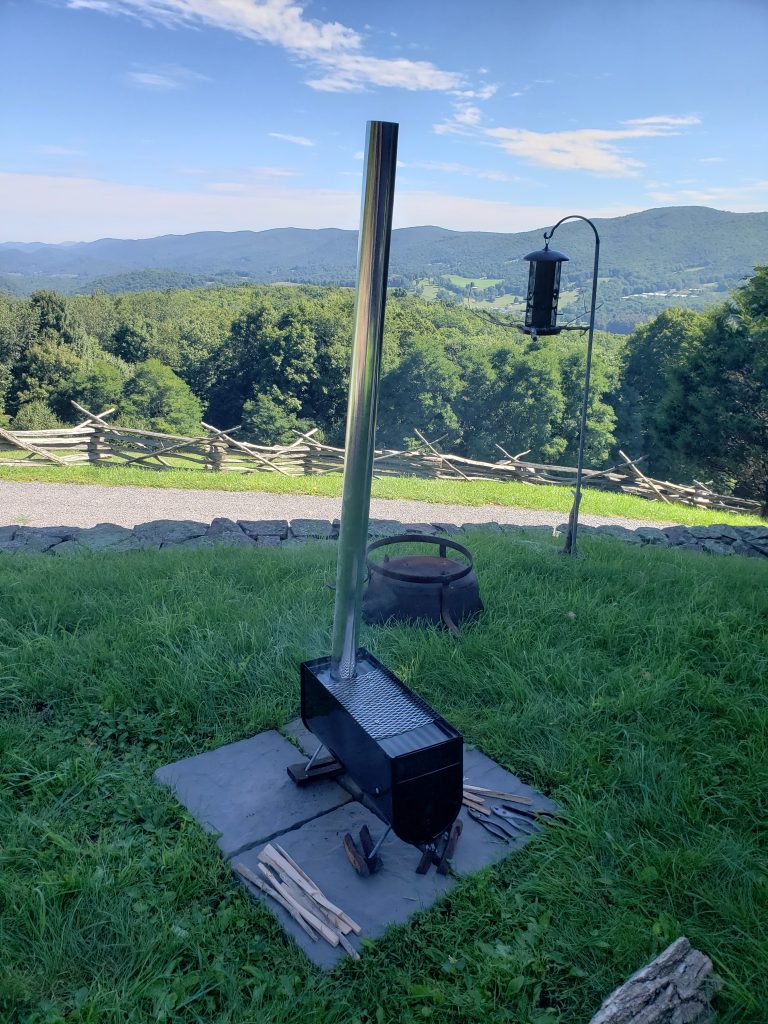
For my first test burn, I took the stove out to my very favorite undisclosed location. It’s got a fantastic view and the people out there seem to like me.
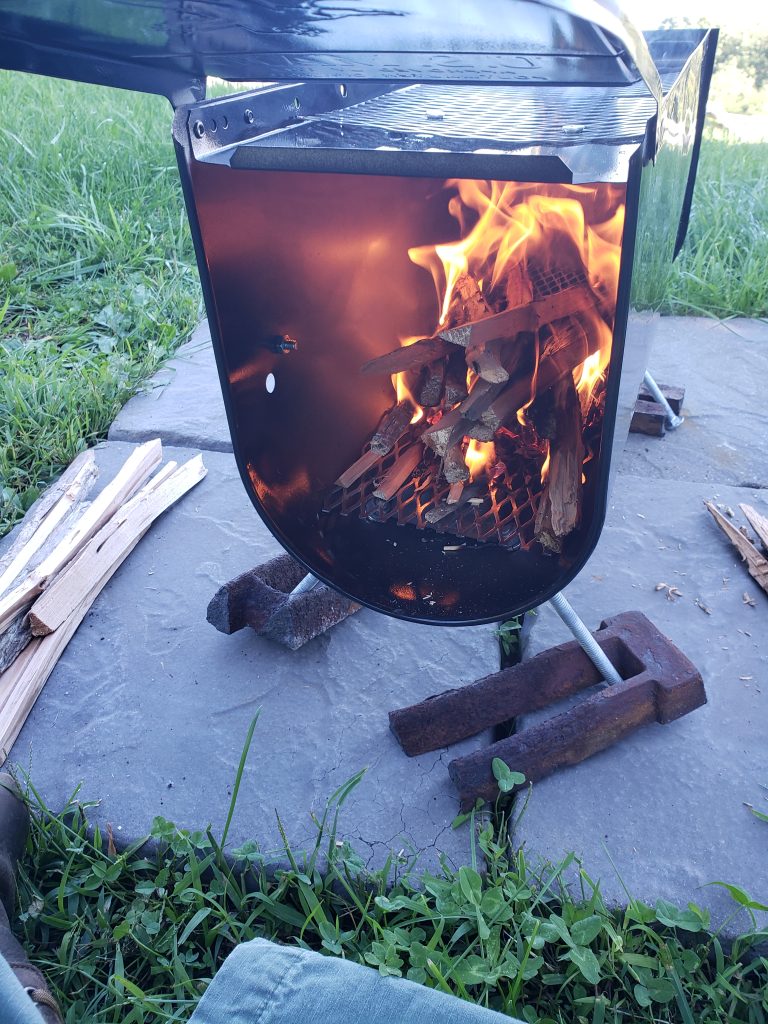
The first burn went great. There was a small degree of warping, which I expected, and of course the smell of paint burning off here and there is… distinctive. But otherwise, it went a lot better than I expected.

The flue had a good draw right from the beginning. There’s not damper in this setup, so I was controlling the burn-rate by how far open or closed I kept the door. I may need to add a damper later if I want it to hold fire long enough that I don’t have to stay up and tend it through the night.
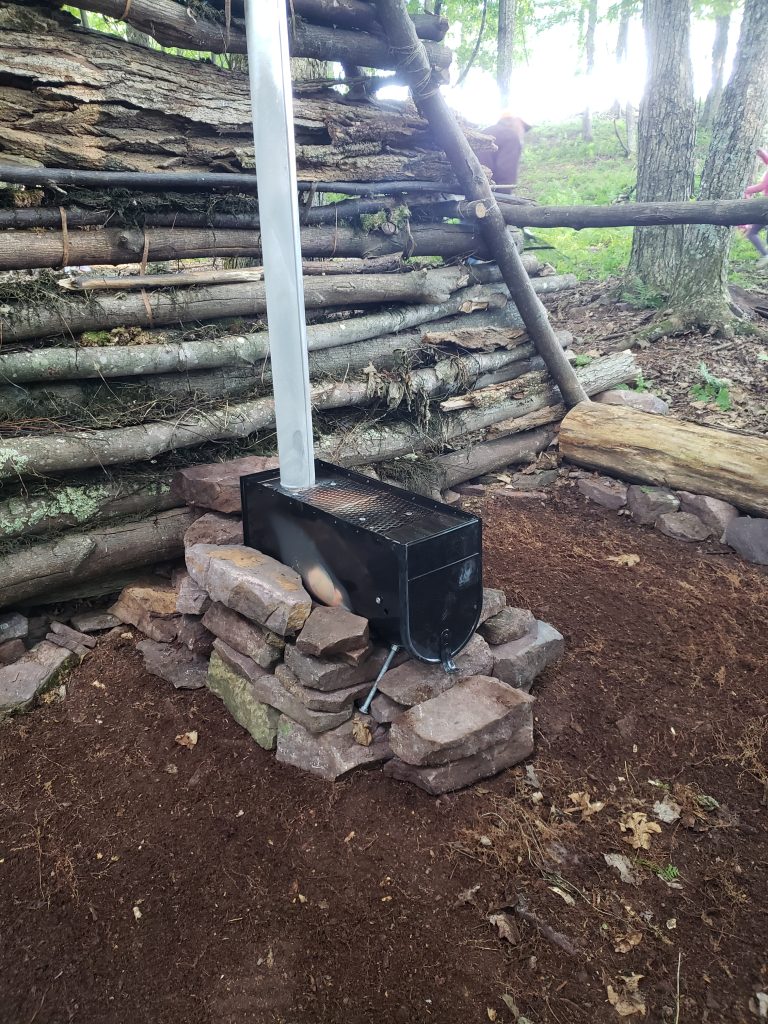
Time to install it in the “fort”. I knew there was a good chance the stove would burn out during the night unless I woke up to tend it at least a couple times, so I wanted a way to hold residual heat in case I had to restart it. My solution was to build a buffer of rocks around the stove not only to hold it in place, but to act as a sort of thermal capacitor.

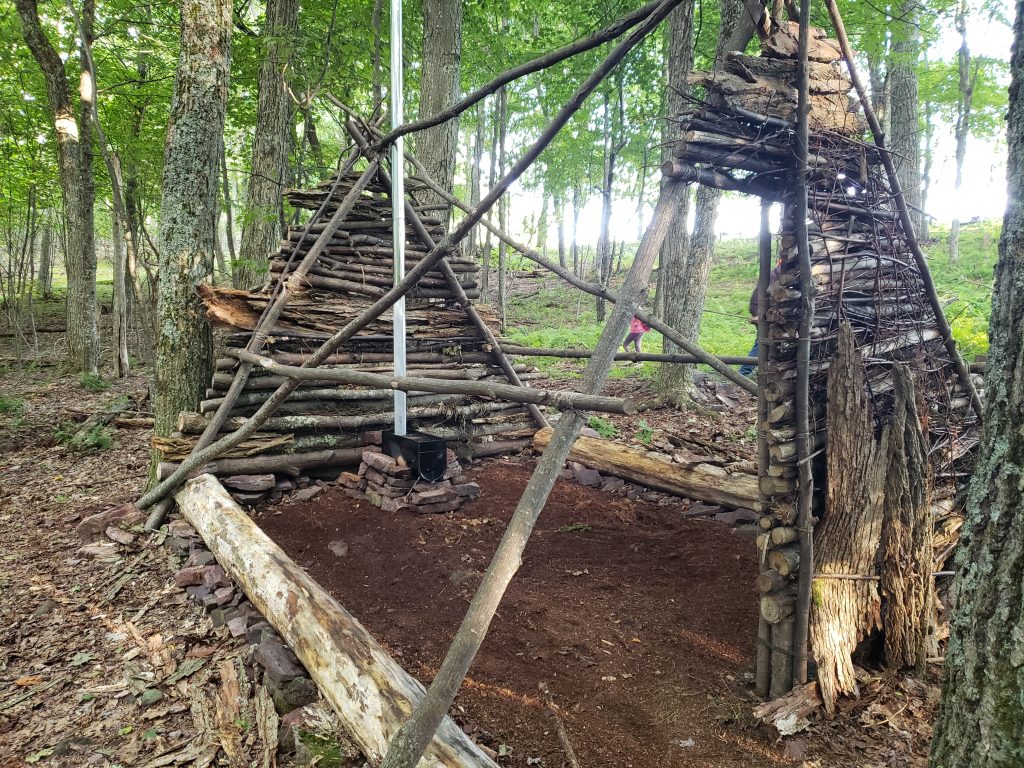
Since these pictures were taken, the fort has been completed. Extra roof supports were added and the structure was skinned with tarps. It turned out really cool, and the Adventure Girls and I are excited to try it out in the cold weather. I’d love to fire up the stove with some snow on the ground. All we need now is the right weather and a pot for hot coca.
And a small battery operated carbon monoxide detector, just in case… I made this thing out of a mailbox after all.
Until next time!
J.R.
PS – Don’t forget to check out my books on Amazon and to sign up for my newsletter!


