I don’t remember when I first heard about hobo stoves, it was so long ago. It could’ve been in one of Louis L’Amour’s short stories set during the depression. (L’Amour himself hoboed at one point). Or maybe I saw old pictures of the migrant works of the dust bowl era huddled against the cold over a squat can of flames.
A “Hobo” was, and still is in some places, a migrant worker who travels the country by hitching rides (legal or otherwise) on trains. They’re differentiated from “tramps” or “bums” by their willingness to work and travel. (Tramps travel, but do not work. Bums do neither). Changes in economic structure, availability of immigrant labor, and the increased speed of modern trains (making them more dangerous to jump onto) have all helped render the hobo a relic of the past.
But the Hobo Stove lives on.
For those that don’t know, a hobo stove is an improvised heating and cooking stove constructed from just about any small metal container a migrant worker could get his hands on. Designs are as varied as the drifters that made them, but in general the stove is vented around the top and bottom (to allow air convection to feed the fire and direct heat upward into a cooking vessel as efficiently as possible) and a wide opening in the sidewall to feed in fuel. Additionally, a good hobo stove should be light, durable, and as cheap as humanly possible.
I like hobo stoves for several reasons. They’re extremely cheap (I’ve never spent a dime on one, instead using materials pulled from my recycling bin). They’re light and convenient. They’re cleaner, safer, and much faster than traditional campfires. You get the satisfaction of using something you made yourself. And if they ever wear out, you can toss them in the recycling and make a new one in less than an hour. They can also be pretty handy in an emergency if you need to do some cooking when the power goes out. You still have to use them outside, obviously, but you can get a pot or kettle running with limited fuel. You’d be surprised how much more manageable some situations become if you can get a pot of coffee on.
Below, I share a look at my favorite hobo stove, and show you how to build one of your own.
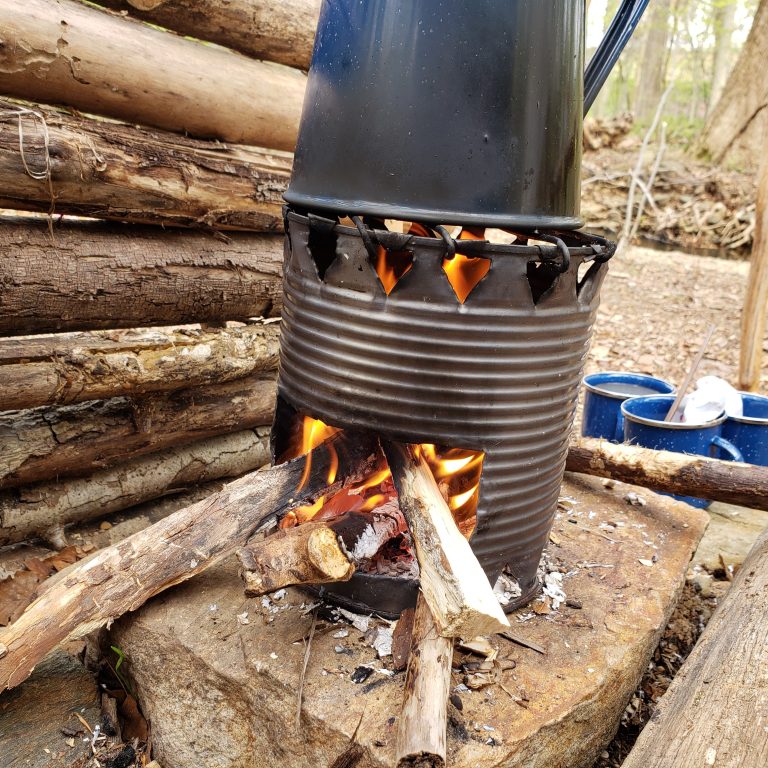
My favorite hobo stove is made from a three-pound coffee can and some coat-hanger wire. It fits my old school enameled kettle perfectly. I always use food containers for my hobo stoves to avoid the toxic vapors associated with things like paint cans. Regardless of what you choose, avoid breathing the fumes the first time you use it, as even food cans often have coatings that burn off during the first use.
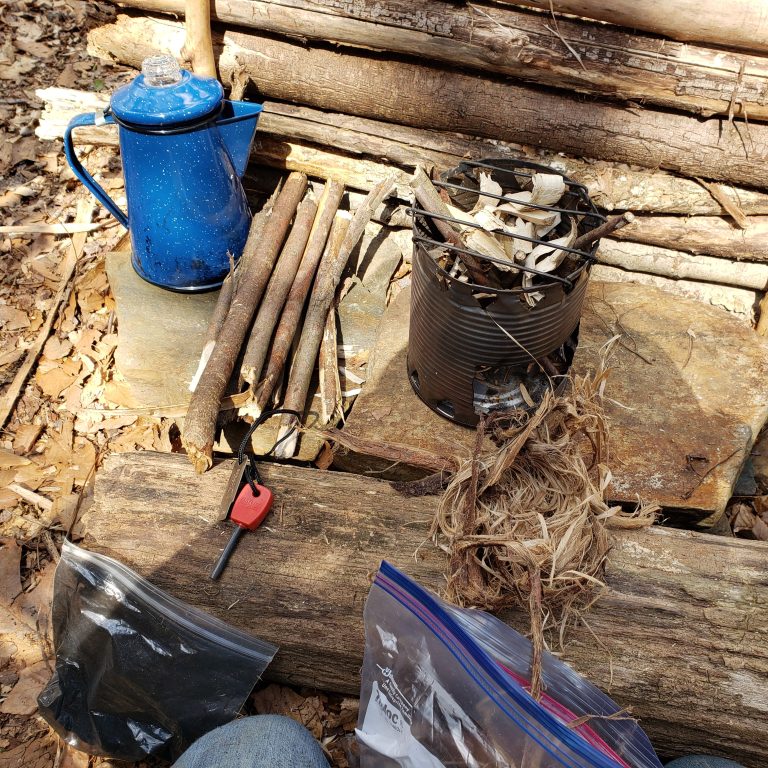
A properly constructed hobo stove is very efficient at directing heat and fully consuming fuel. Notice how little smoke is visible in the pictures below. The small pile of sticks above is more than enough to bring a full kettle to a rolling boil.
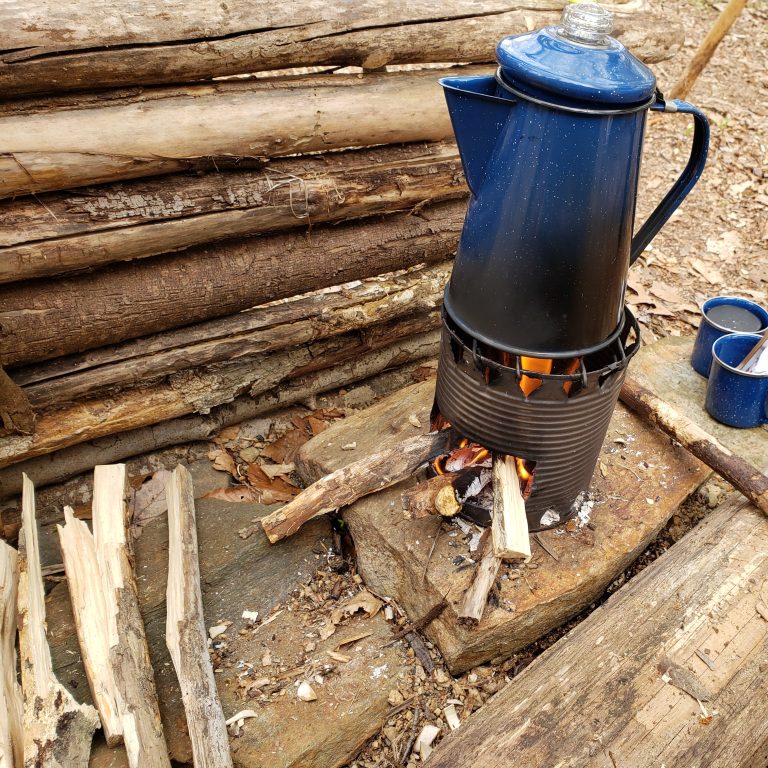

Sticks only need to be cut to size to initially establish the fire. After that, you can feed sticks of any convenient length through the door, sliding them in as they burn. You also have some control of burn-rate by angling the stove opening toward or away from the prevailing breeze


It takes very little to run a hobo stove. Other than fire-lighting gear, I just use a shemagh for a hot mitt and a pointed stick to turn the can toward or away from the breeze. This camp was close to a creek, so when the stove had burned down, I could just pick it up with a pair of pliers or hooked stick and wash/extinguish it in the water. It would hold just enough heat to come out dry. They’re also extremely clean burning, and generate very little ash. The hearth in the pictures above was used multiple times, and each time there was no trace I’d had a fire when my stove and I left. Which is good, because my HOA is weird about that kind of thing (but that’s a story for another time).

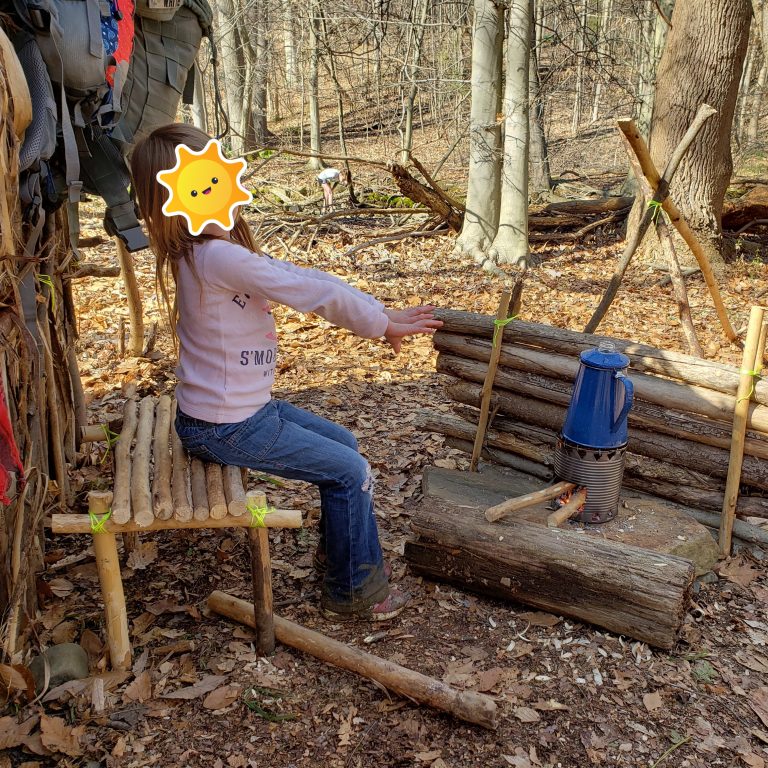
Hobo stoves are great for comfort and morale around camp without having to establish fire-watch for very long. It only takes a little time to get smores or hot chocolate into action. They’re also great for teaching children how to manage and control fire. Kids love them.
Build Your Own
To see how to make your own hobo stove, keep reading.
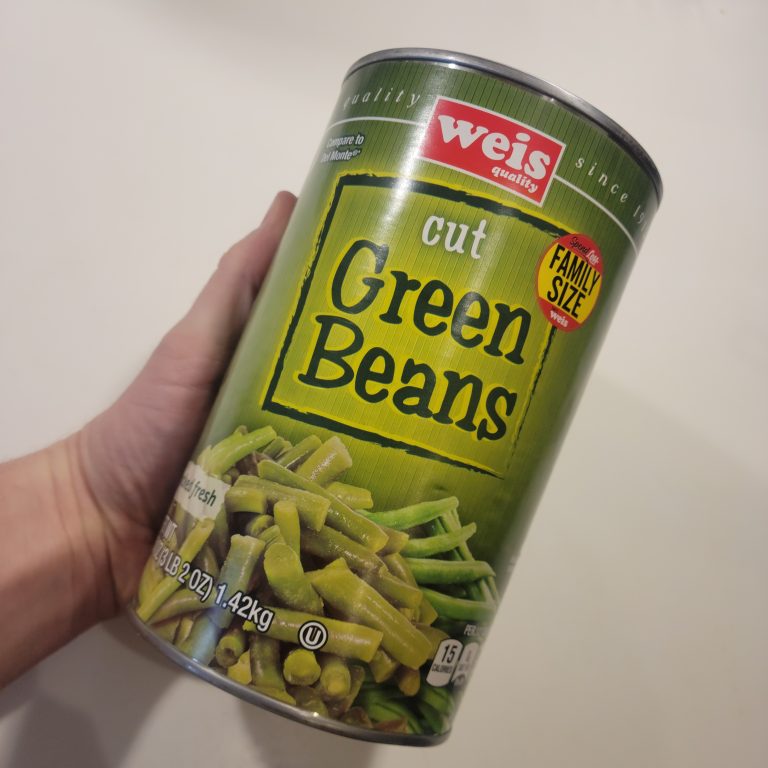
Since I already have my larger stove, I decided to make a smaller one for solo scenarios. I started with a large can of green beans. Eat the beans, discard the label, keep the can.
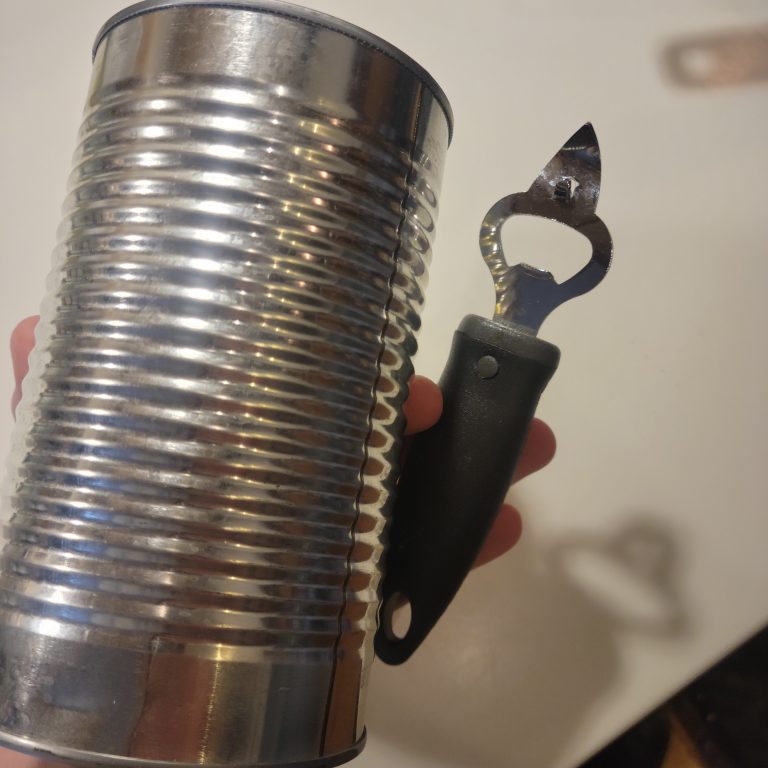
Now that you’ve got a stripped and topless can, you need a punch opener. It’s that pointy thing your grandma used for opening cans of condensed milk and Juicy-Fruit. See, fruit punch used to come in a can and… never mind. I’m old, deal with it. Moving on…
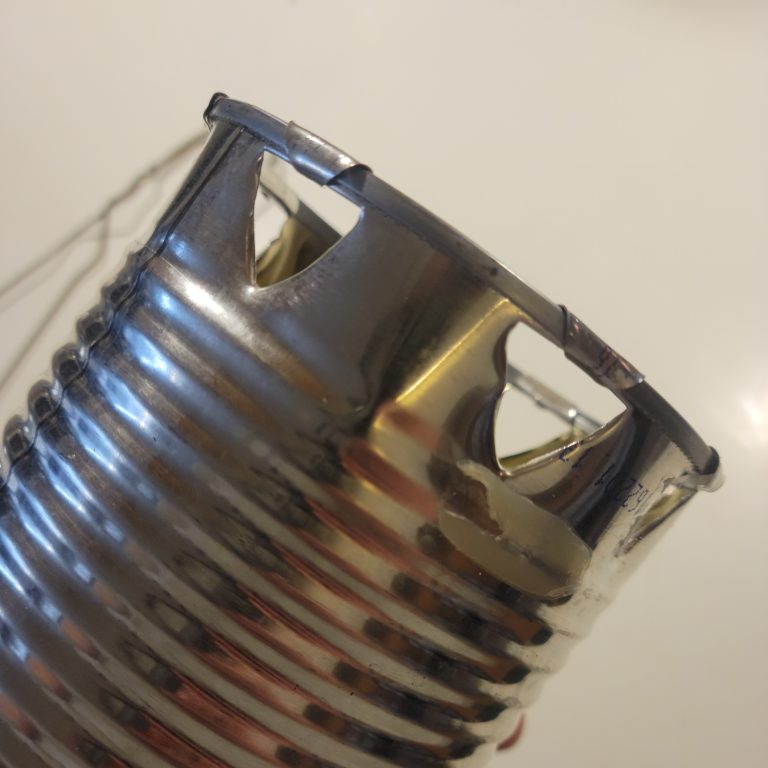
Use the punch opener to make a ring of vents around both the top and bottom rims of the can as pictured below. These will allow air to feed into the base of the fire from all sides and help with even heating.
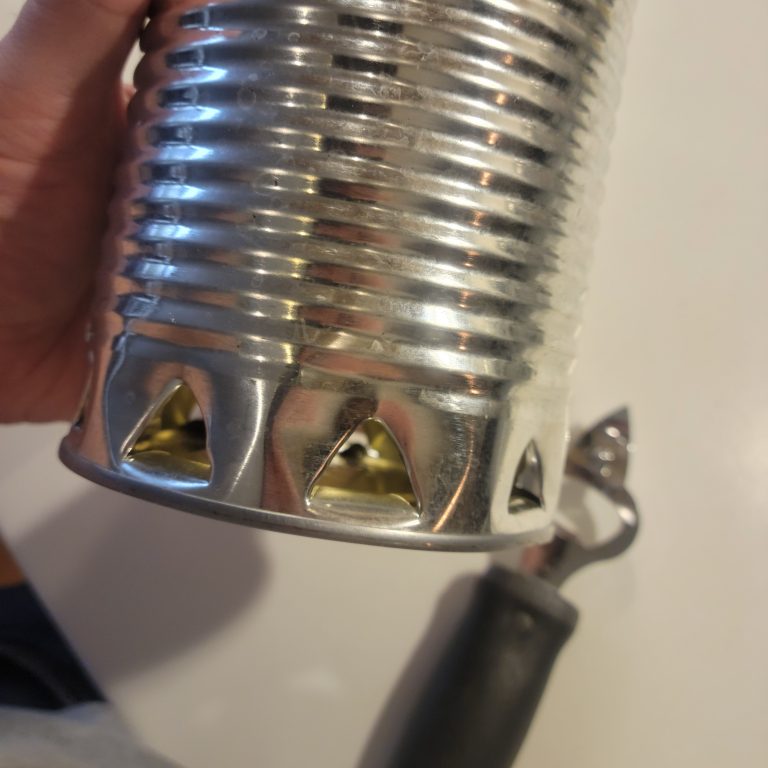
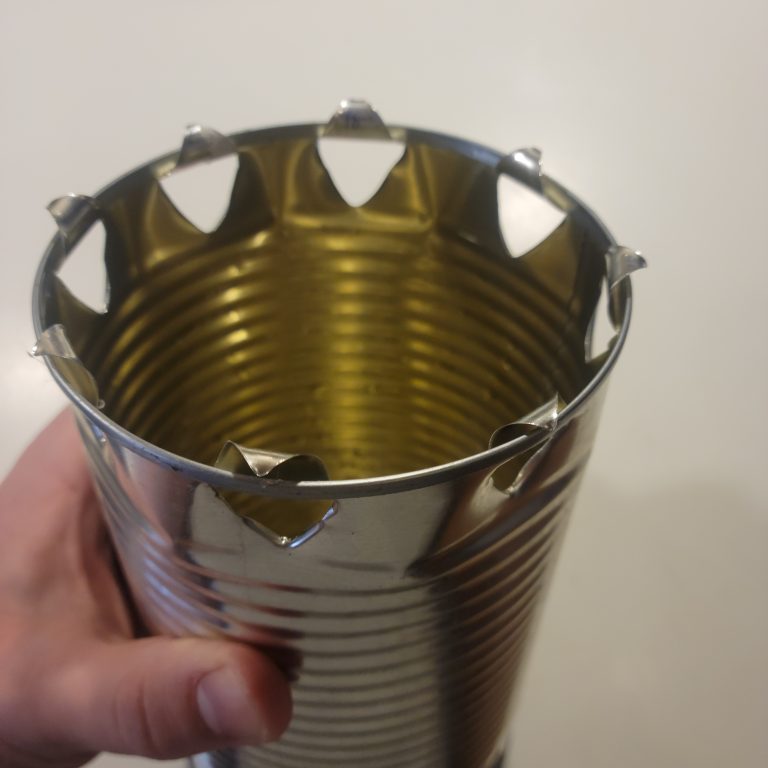
Those vents tend to come out sharp and gnarly, so you’ll want to wrap that peel of metal around the can rim to get it out of the way and avoid cutting yourself. I used a pair of channel locks to tidy mine up (see image below) but any sort of pliers should work too.
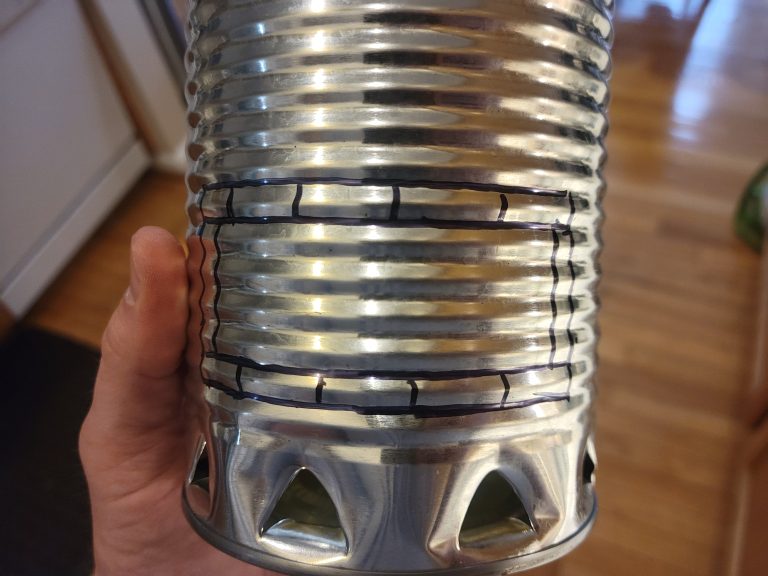
Next, you’ll want to mark out your stove opening. In the image above, I’ve marked the inner area to cut out, and several cuts radiating from it to make tabs. I can fold over the tabs to give the opening a thicker and less sharp edge. I used a hacksaw and a pair of tin-snips for this, but you could also do it with a Dremel if you’re made of money or something.
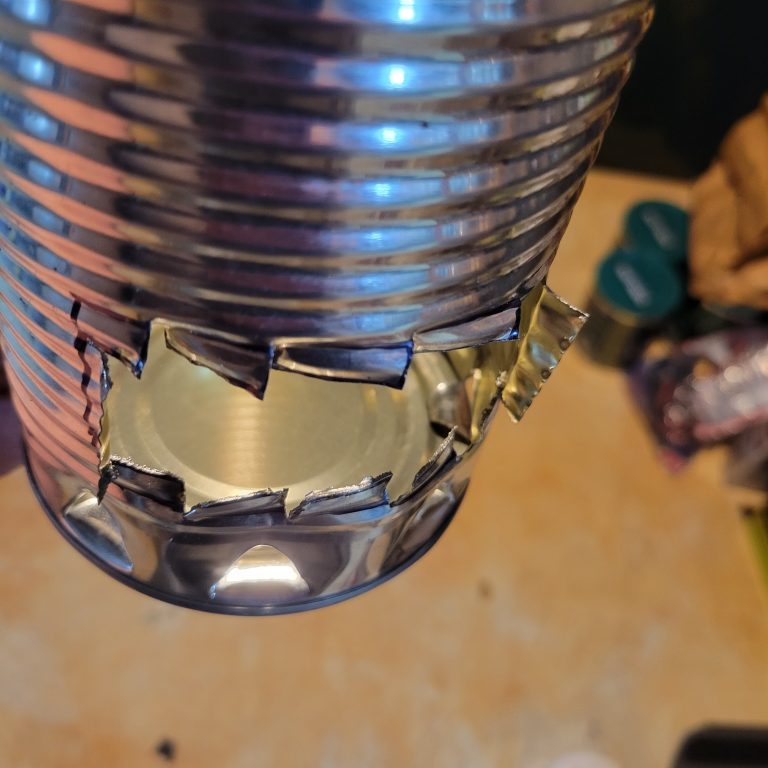
Above are the snaggle-toothed tabs you end up with, and below is how they look folded into the opening. You could skip this step and cut the opening without the tabs if you want, but I think it’s worth it to reduce risk of cuts. The folded edge seems to last longer, too.
At this point, you can use the stove with any vessel larger than the mouth of the can, but I have another step I like to do first.
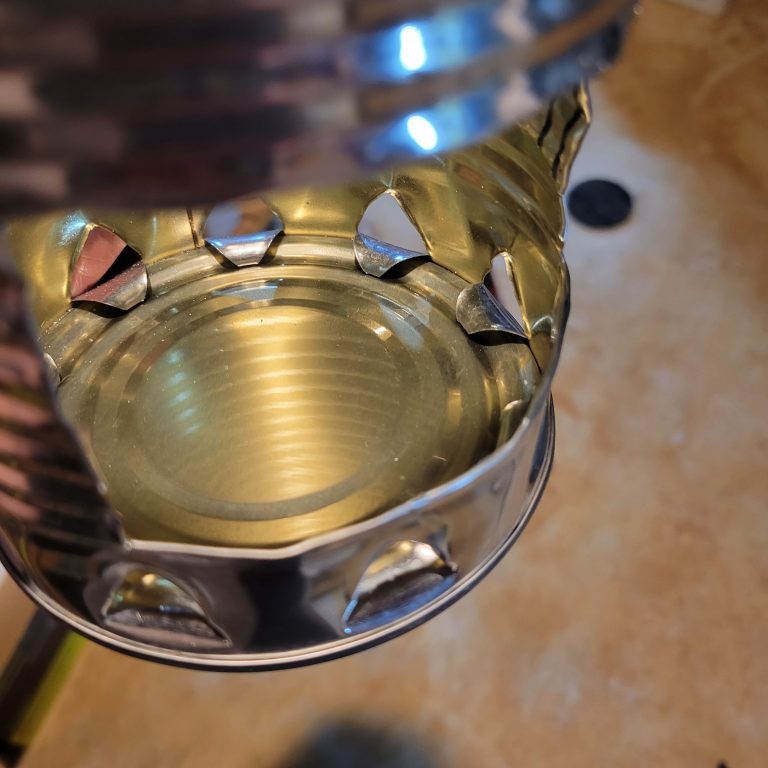
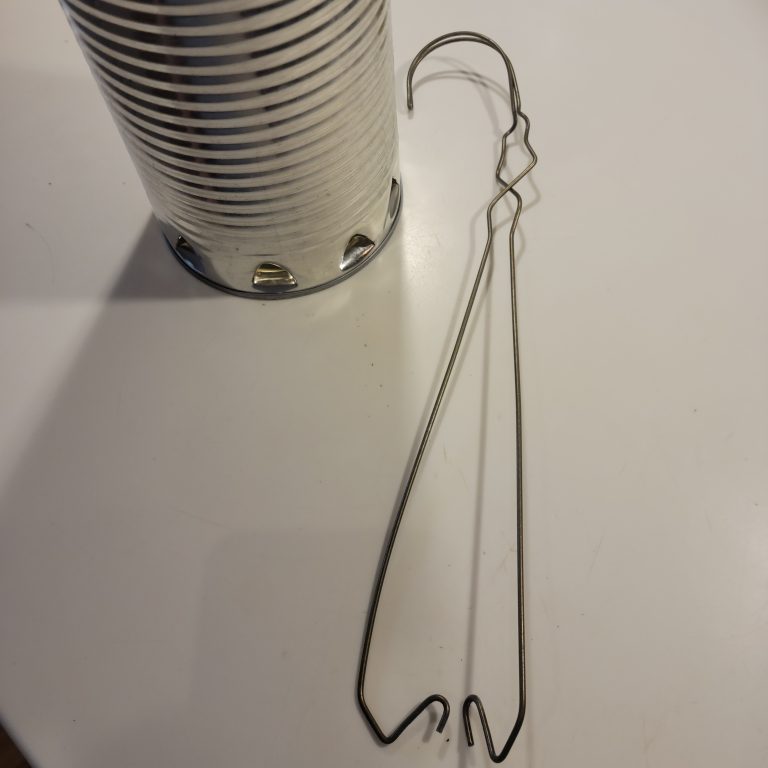
I like to add some sort of grill-grate to my stoves, in case I want to heat a vessel smaller than the mouth of the can. On my coffee-can stove, I just mounted the grill permanently, but I wanted to try something new with this one.
Get some rigid steel wire. An old coat-hanger works great.
Below are the grill bars I constructed. I can take these in and out by laying them through the vent holes we punched earlier.


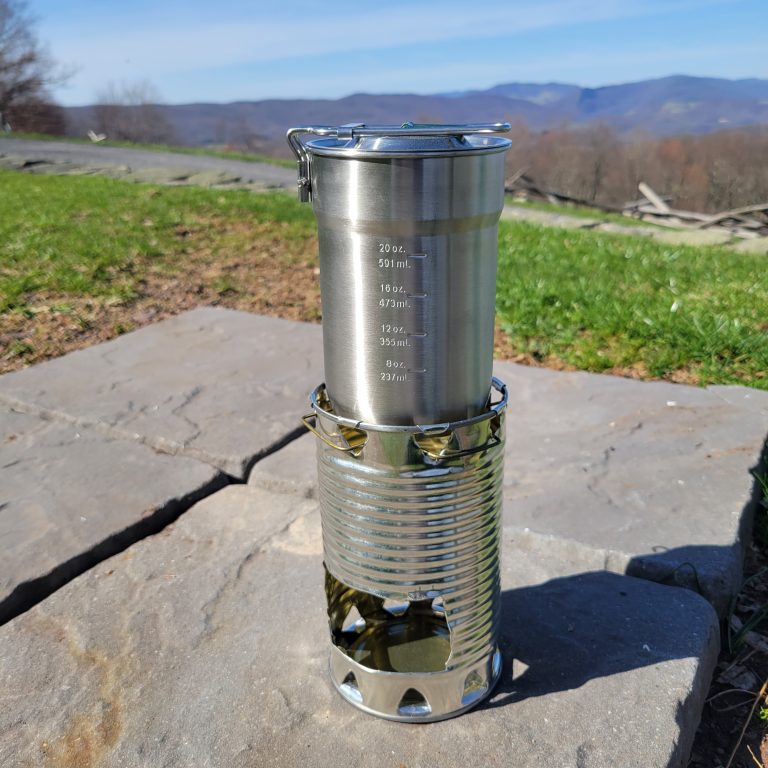
You can see how I use the grill bars in the image above. One of the reasons I went with removable bars is the Stanley lightweight cook-pot I plan to use with the stove. With the bars removed, the pot fits right down into the stove, which makes the whole setup very compact for stowage.
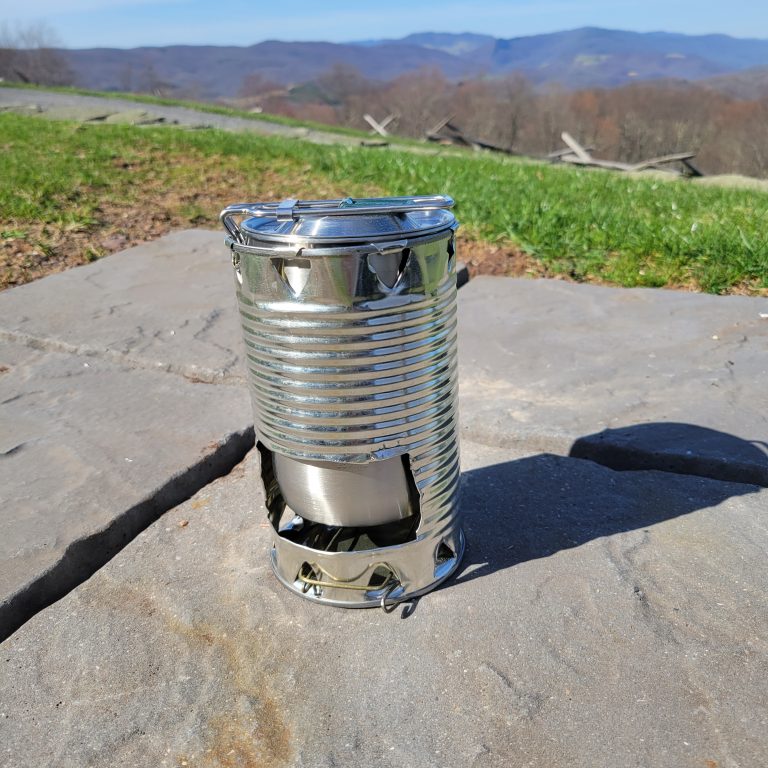

Here’s a look at the pot and stove as stored and as used. I store the grill bars by moving them to the bottom of the can. It packs up pretty nicely. (The Stanley cook pot is at this link. I don’t get anything if you buy it, just sharing for those interested).

That’s all for now, Folks. I hope you get the chance to try this out for yourselves.
If you want to see more of this kind of content, please let me know on social media. I have a few more things like this that I can sprinkle in with my writing posts.
As always, you can support me by buying my novels on Amazon or Audible, leaving reviews, and sharing my content with your friends and neighbors. I really appreciate it!
Until Next Time!
J.R.
PS – You can read more posts in the Creative Outlets series at these links: Carving the Kuksa, The Mailbox Wood Stove, Restoring an Axe, Canoe Paddle Restoration, Building a Live Edge Bar Sink. You might also enjoy my posts on foraging for Morel Mushrooms and Wild Ramps.
My Novels:
Shadow of Wolves – Amazon (all formats) and on Audible (performed by veteran voice actor Micah Mason)
Hail of Brimstone – Amazon (all formats) and on Audible (performed by veteran voice actor Micah Mason)
Signed copies available in my shop!


